Saturday, 28 January 2017

Love Heart Jewellery Suncatcher

Love Heart Jewellery Sun Catcher 


Prefect for Valentine's Day or even Mother's Day or for your self.

What you will need to create. 

Large Plastic Milk Jug
Scissors
Hole puncher
Jewels, glitter or sequins.
Ribbon

How To Make Recycled Pretty Jewelled Heart Suncatchers
Wash and dry your plastic milk jug and then cut out the large flat rectangular sides. (Make sure your plastic milk jug is thoroughly clean or the stale milk smell will ruin your suncatchers.) With a marker pen or pencil draw on your heart shape and cut it out. Very young children may need some adult help to cut the plastic. Use a simple hole punch at the top of the heart to make a hole for threading your ribbon. Cover one side of the heart thickly with glue. Now stick on your jewels, glitter or sequins and set the heart aside to dry.
Once your heart suncatcher is completely dry you can thread some ribbon through the hole at the top and hang it in the window.
These homemade sun catchers are such a simple and adaptable idea, once the children have made the suncatcher, they can create other shapes, and sizes. 


Wednesday, 23 November 2016

Snowflake

Snowflakes 
regular or jumbo popsicle sticks (3 per snowflake)
paint
gems
sequins
craft glue
large snowflake confetti
feathers
glitter glue
permanent pens
ribbon to hang


Crafts and other activities


Paper Plate Craft


Paper Plate Tree

Supplies Needed:
Paper plate (1 per tree)
Clear tape
Green paint
Glue
Multi-coloured pom poms
In order to make the cone shape, you will need to cut a chunk out of your paper plate. Find the centre and cut out a wedge.
Roll the plate into a cone shape and seal with tape. Since you will be painting the cones, keep all the tape on the inside. I made little rolls of tape and used that to hold down the outer flap down. If you find you need tape on the outside, wait until your paint is dry before taping it down. Paint your cone green. While it will work to paint your plate before making the cone, I've always found that my girls loved the idea of painting on the cone shape. Sometimes it's fun to mix things up and paint on a different shaped object.
After the paint dries, glue on all your pom poms.
You can add sequins to it to make it sparkles, glitter etc

Monday, 17 October 2016

Halloween Projects

Halloween is coming so here is some art and craft project. There will be more coming. Make sure you check out Happy Kid's Corner facebook group 


What you will need. 
Orange paint (if you don't have orange paint mix red and yellow together) 
Green paint 

Apple 
Paper 
Paint Brush 
Black paint or paper

Cut the apple in half 
dip it in the orange paint 
stamp it on the paper
to add the leaf and stem
Add eyes with either black paint or black paper


🎃🎃 Puffy Ghosts 
White Cardstock paper
Scissors
Glue
Cotton Balls

Black paper

Start by cutting out a ghost shape out. Cover the shape with cotton balls, and cut out eye shapes or googly eyes,cut out mouth shape and glue them on to the ghost.


Frankenstein Toilet Roll 
- paint it green
- add hair
- glue on googly eyes
- add stitches
- add mouth
- glue on grey beads on the side

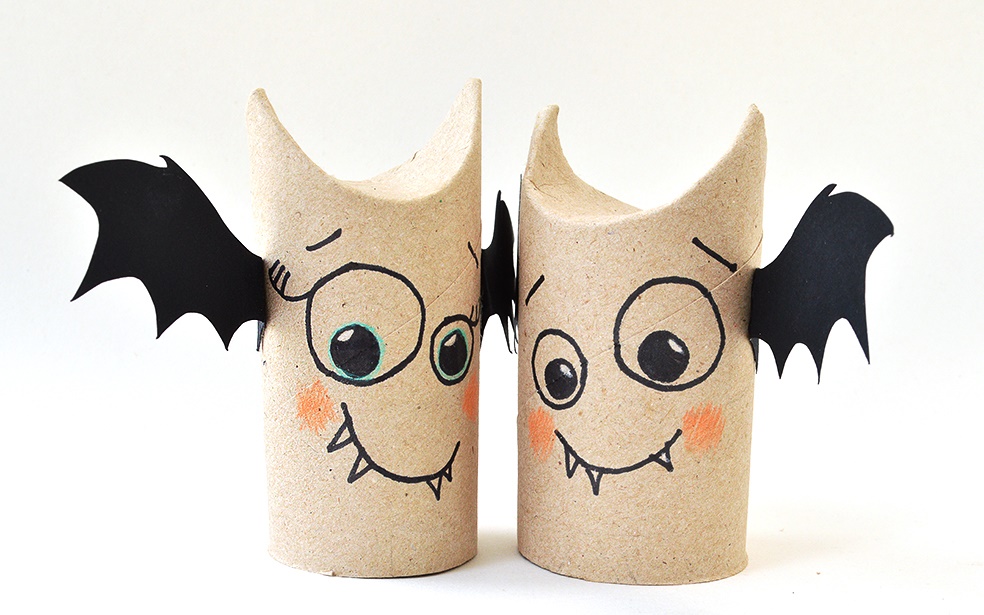
TOILET ROLL BAT BUDDIES
Fold in the top of the toilet roll to create the bat ears, glue the fold into position (use kitchen paper tubes if you prefer)
Cut the wings out of black craft paper and glue to the sides of the TP roll
Draw on the goofy facial features

Toilet Roll mummy 
Wrap the tube in tissue leave a space for the eyes
glue on the eyes

Toilet Roll Cats 
Start by squishing down the top of the paper tube cores to create to ears.
Paint with black paint and leave aside to dry. The joy of painting toilet roll cores is that the paint soaks in and dries super fast.
When dry it’s time to watch the cats emerge…
– cut lemon shape pieces of yellow paper and draw the pupils on with black marker
– glue on the eyes
– make little holes in the cores, push in the pipe cleaners and bend to make the tail and whiskers


Halloween Paper Plate Wreath
What you need
– Paper plate or a cereal box would even work
– Finger Paints
– Halloween colored tissue paper
– Glue
– Construction Paper
– Ribbon or String for hanging
Cut out the middle of the paper plate.
The first step is the hand print spider. Pick out what colour of construction paper you’d like to use and have your child use both hands to make the hand prints on top of each other facing opposite ways to represent the spider like the one above. Once it dries you can add googly eyes or personalise it with a Halloween message but that’s totally up to you! While the hand prints dry you can work on the wreath, cut up your tissue paper into small squares and cut the middle out of your paper plate. Then scrunch the tissue paper up and start gluing it to the paper plate